

How to Restore an Antique Tractor Steering Wheel—Pros, Cons, and Professional Tips
/
At Antique Power magazine, we have seen newbies do beautiful work restoring an antique tractor. Fortunately, one of the easiest and most satisfying parts to restore is the steering wheel. Since “The Newbie” would never want to “steer” you wrong, I asked professional restorer Dale Fye for some steering wheel repair tips. He is the owner of Trusty Tractor Restorations in Shelton, Washington, and the president of his local antique tractor club, EDGE&TA (Early Day Gas Engine and Tractor Assoc.) Branch 245.
First of all, Fye raised the important question as to whether to restore the steering wheel at all or simply replace it. The answer depends. There is a difference between running a restoration business, where you must charge for labor, and doing tractor restoration as a hobby when you might have more time than money to spend.
“In the restoration shop, what I usually do is just buy a new one,” Fye said. “Steering wheels are relatively inexpensive. I can’t invest two or three hours in restoring one, when I can just buy one for 50 bucks. Usually the old ones are worn. I’ve seen the nubs on the back get worn down to just about nothing. Or they get chunks knocked out of them, or they turn your hands black.”

Photo by Candace Brown
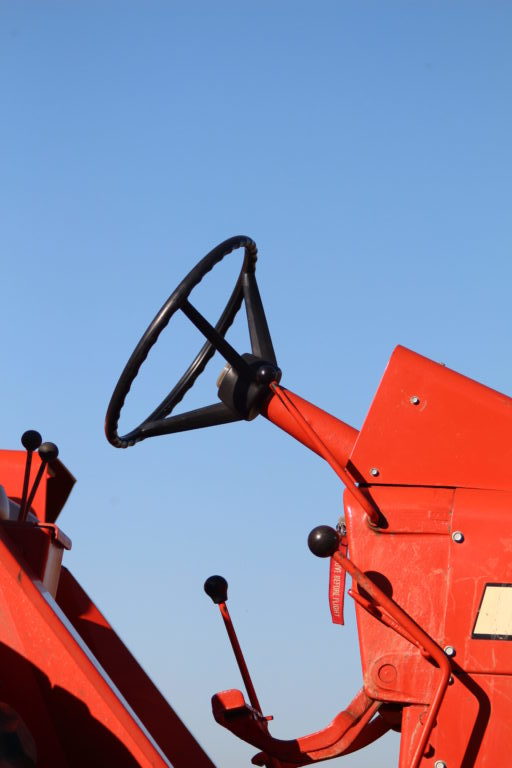
Photo by Candace Brown
Cracks or missing pieces present the biggest challenges. Some old steering wheels might actually start to crumble. At that point, you need to seriously ask yourself if it’s worth trying to save. Sometimes, however, you don’t have a choice.
“If you have a rare or unusual tractor, and you can’t find a replacement steering wheel, your only option is to restore the one you have,” Fye said. “If it’s beyond something you want to do yourself, then there are professional outfits. You can take the wheel off and send it away, and they will actually re-coat it and do the whole thing and send it back to you. It will look just like new.”
Another big challenge is straightening the metal core of a bent steering wheel—something Fye has done.

Photo by Candace Brown
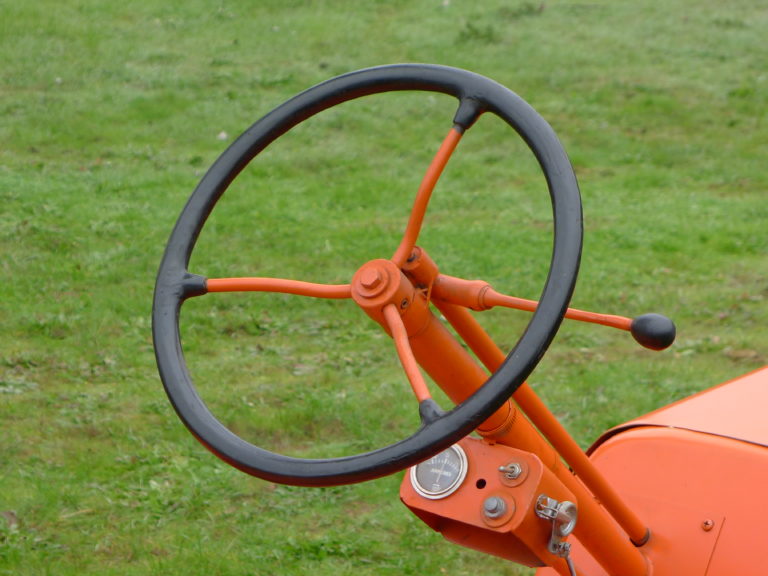
Photo by Candace Brown
“Sometimes you can put a long bar or a 2×4 through the wheel and pry on it a little bit, he said. “You have to be careful not to damage it. If it’s not bent too badly, you can kind of flex it back.”
Pulling the steering wheel without damaging it can be very difficult, and it might not even be necessary. Fye’s tips will help you do a good job with the steering wheel still attached to the tractor, or not.
Here is his method for dealing with a wheel that turns your hands black or has cracks in the hub or rim. For the sake of your health, he stresses GOOD VENTILATION when dealing with any of the chemicals or products involved.

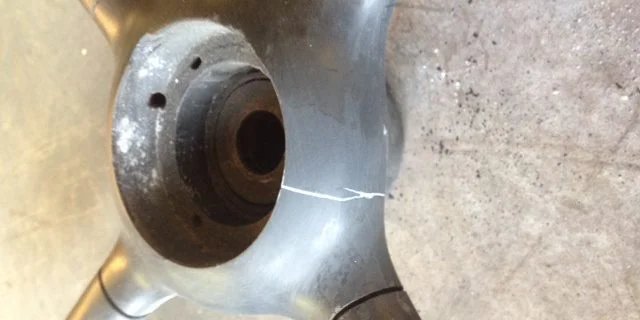
This photo shows typical cracks in a steering wheel rim. Photo by Dale Fye

Filler has been applied to cracks in both the hub and rim. Photo by Dale Fye
Here’s how the filler should look when sanded smooth after it has dried. Photo by Dale Fye
1.) Scuff the black coating with a Scotch® pad or fine sandpaper. If there are rough edges, you can smooth them down with a fine file or sandpaper. Get it nice and smooth.
2.) Wipe the sanded wheel down with lacquer thinner, or prep-solvent. Let this dry.
3.) If you have small cracks in the rim or hub, these can be repaired with body filler. (If you have large chunks missing from your wheel, you might want to look for a replacement.) Make sure the crack is free of grease and dirt. Fill with body filler, let dry, and sand till smooth with fine sandpaper. Filler shrinks as it dries, so two or three applications are needed for deep cracks.
4.) Tape off around the wheel spokes and steering shaft, and cover surrounding area with a drop cloth to prevent overspray.
5.) Apply two or three coats of primer-sealer. Make sure you use primer-sealer and read the instructions on the can! Let this dry.
6.) Lightly scuff the primer-sealer with Scotch® pad. Remove dust. A tack rag works great.
7.) Apply two or three coats of the color of your choice. On most tractors and vintage trucks, I use a semi-gloss black spray enamel.

Photo by Dale Fye
How much experience does Fye have with steering wheels? Plenty!
“One hundred percent of the tractors that go out of here have a restored or new steering wheel on them,” he said. “I’m sure I’ve put well over a hundred steering wheels on over the last 20 years.”
Who knows? You might enjoy steering wheel repair so much that you won’t be able to quit. (I’m not betting on that.) In any case, The Newbie hopes these guidelines help make the job easier. Even if you don’t restore the entire tractor, fixing that one part will be a big improvement.
Thank you, Dale Fye!
If you can't find Antique Power on a newsstand near you, call 800-767-5828 or visit our Gift Shop to order current or back issues. To subscribe, call 888-760-8108 or click here.
